
|
Creating a Connection and Action in PerfectApps |

Before building any connections to work with Salesforce data, we must start with one that returns a Bearer Token that will be used in subsequent actions.
Open your PerfectApps account and proceed to the Connections tab.
From the New button, start a new REST Web Service connection.
1. In the General section, enter a suitable name.
2. In the Service Details section, enter the Service URL. The Service URL will be composed of ‘https://’ + the instance name assigned to your account by Salesforce + my.salesforce.com
A typical example will be: https://d6h000000qre8vae-dev-ed.my.salesforce.com
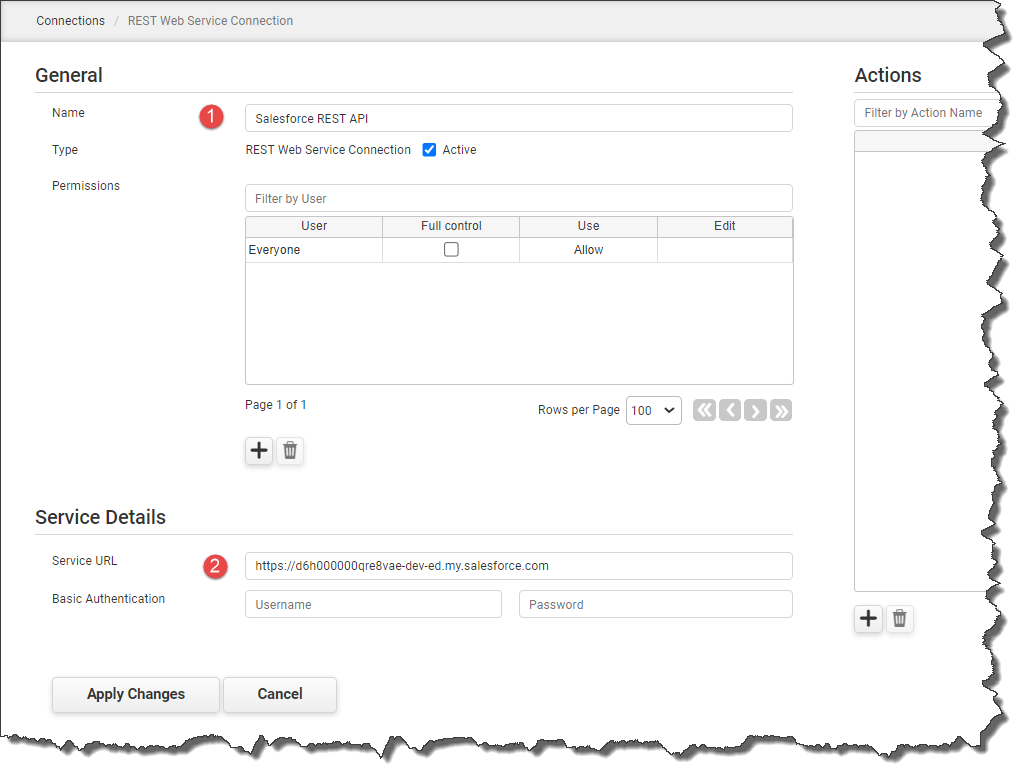
Click Apply Changes to save the connection
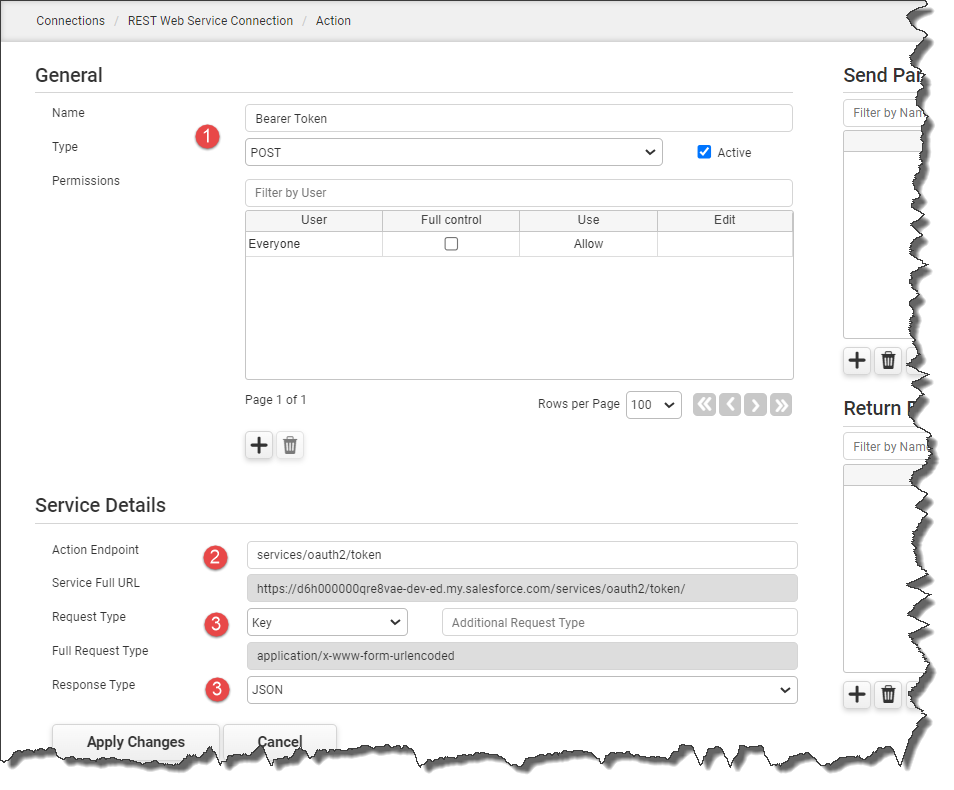
Create a New Action
1. In the General section, enter a suitable name, such as Bearer Token, and select the type POST.
2. In the Service Details section, enter the Action Endpoint: services/oauth2/token
3. Select the Request Type as Key and the Response Type as JSON.
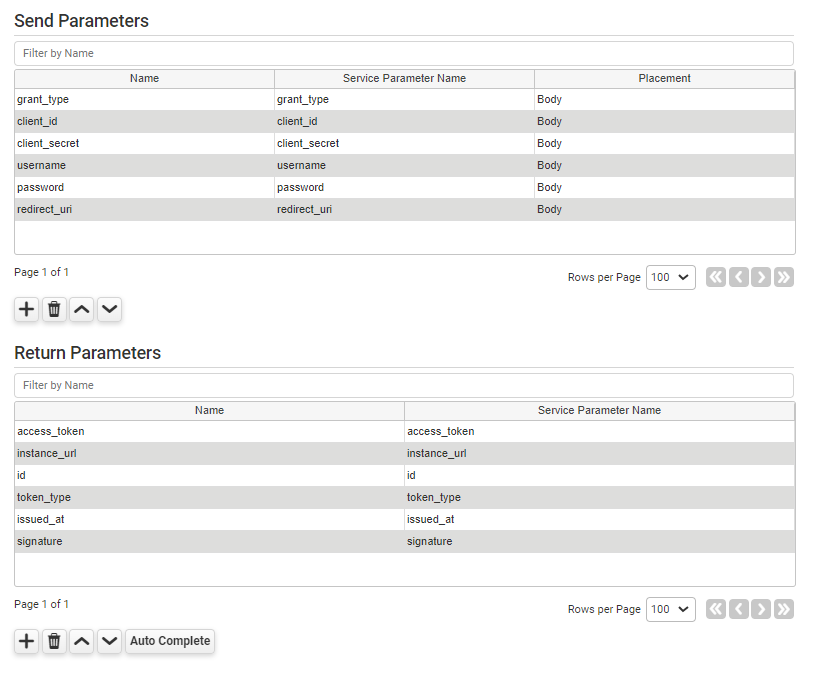
In the Send Parameters table, enter the following parameters:
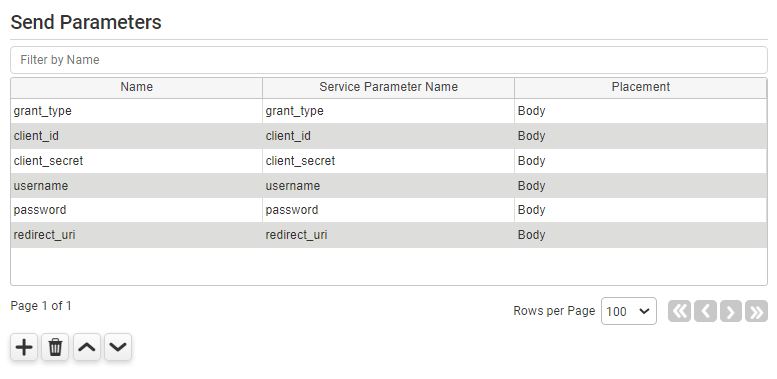
Click the Apply Changes button to save the Send Parameters.
The next step is to run a test connection to check that it works and to retrieve suitable return parameters.
Click the Test button and use the following values for each send parameter:
For grant_type, use the text password
For client_id, use the Consumer Key from the Salesforce Consumer Details area earlier.
For client_secret, use the Consumer Secret from the Salesforce Consumer Details area earlier.
For username, use the one to log in to your Salesforce account.
For password, use the one to log in to your Salesforce account.
For redirect_uri, use the callback URL in the Salesforce settings. This will be the App Link of the app created during the preparation phase earlier.
Click the Connect button. Provided that the connection has worked, you will get a response like this:
Successful response
Status Code: 200
After a successful test, click the Auto Complete button in the Return Parameters section. The parameters are returned in a dialogue box; click the OK button to enter them in the table.
 |
Be aware that the Return Parameters can also be entered manually. |
Click the Apply Changes button to save the Action.
The Bearer Token Action is complete and returns the Bearer Token via the ‘access_token’ parameter. The Bearer Token is then used in subsequent API requests and remains active for 60 minutes.
 |
We recommend that you run a new test using the same values mentioned above to check that a Bearer Token is returned. |
You may now proceed to build any actions that you need for integration with Salesforce.
Further information can be found here: https://developer.salesforce.com/docs/atlas.en-us.api_rest.meta/api_rest/dome_sobject_create.htm
Return to: Supported REST Web Services, Preparing to integrate with Salesforce, Creating a connected app in Salesforce
