
|
Creating a Connected App in Salesforce. |

Open your Salesforce account and switch to the Lightening Experience if it’s not already selected.
Note the instance name assigned to your account in the URL by Salesforce.
Copy and save this somewhere so that you can retrieve it later. Typically, this might be like this: ‘d6h000000qre8vae-dev-ed’
Click the Setup icon near the top right corner.
From the setup menu on the left, scroll down to PLATFORM TOOLS and select Apps and App Manager.
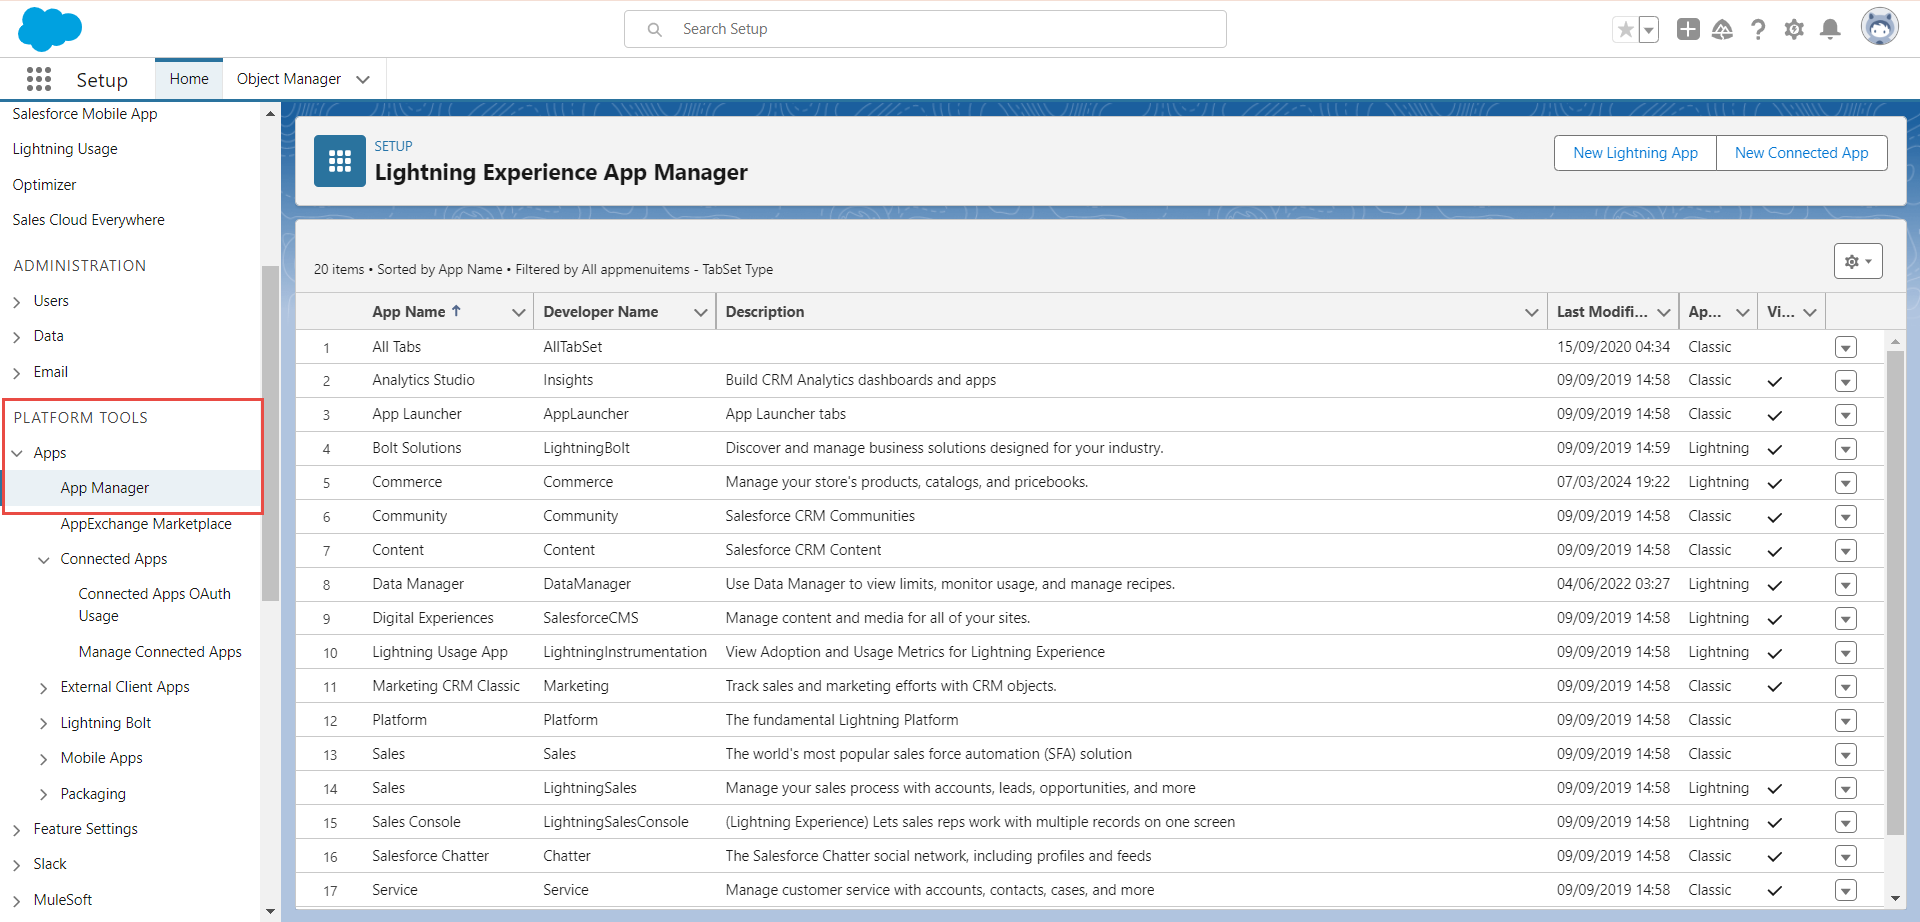
Use the button at the top right of the screen to create a New Connected App.
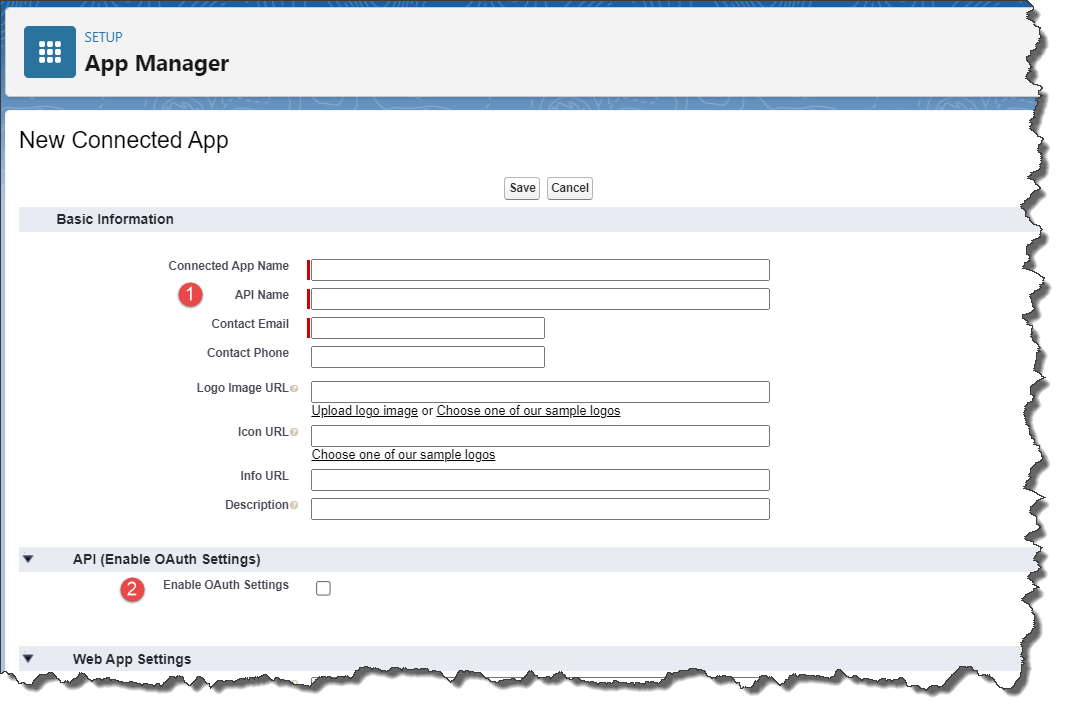
1. In the Basic Information section, enter a Connected App Name, API Name and a Contact Email address.
2. In the API (Enable OAuth Settings) section, click the option to Enable OAuth Settings.
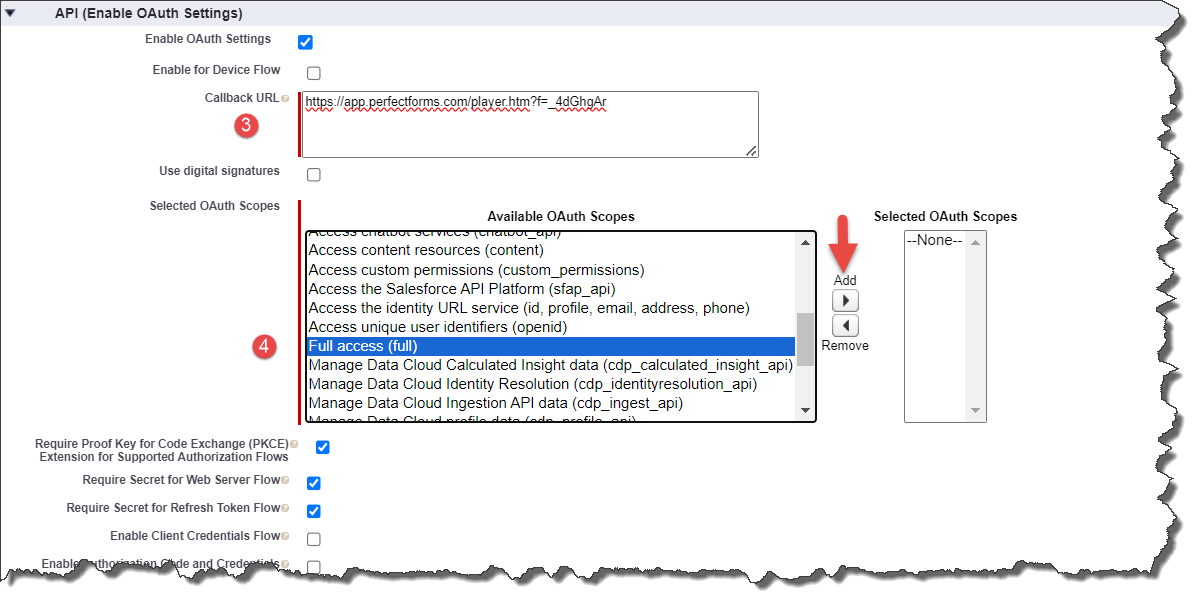
3. In the Callback URL box, enter the PerfectApps app link saved during the preparation stage above.
4. In the Selected OAuth Scopes section, scroll down, select and add the Full access (full) option.
Click the Save button at the foot of the section to proceed to the next step.
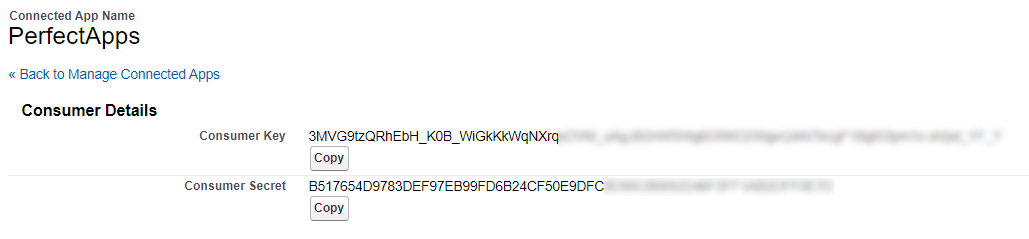
Click the Manage Consumer Details button from the API (Enable OAuth Settings) section. (You may need to confirm your identity with an authorization code sent to your email.)
The Consumer Details section will provide a Consumer Key and a Consumer Secret. Copy and save both of these to use later.
Click the option Back to Manage Connected Apps.
Click the Manage button near the top of the screen.
Click the Edit Policies button.
In the IP Relaxation section, choose Relax IP Restrictions.
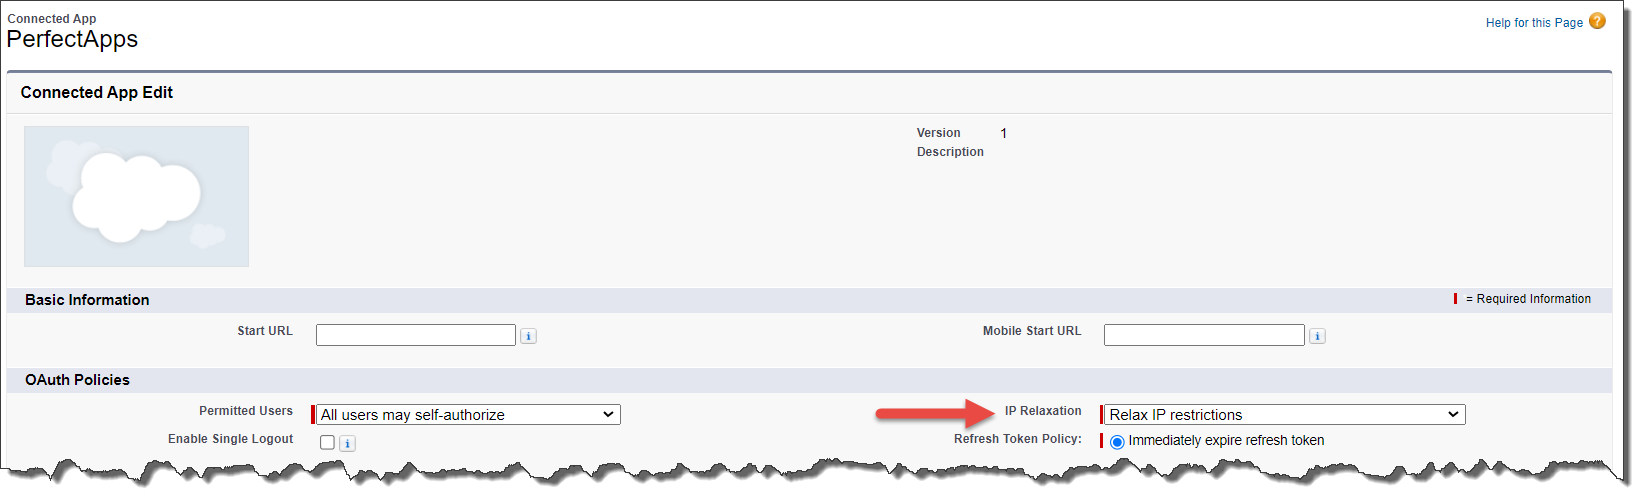
Save the changes. The configuration in Salesforce is now complete.
Next Step: Creating a Salesforce connection
Return to: Supported REST Web Services, Preparing to integrate with Salesforce
