
Before building any actions that work with Google data, we must obtain a code to invoke the Google API and return the OAuth Access token (Bearer Token) for the selected app.
One way, but not the only way, to obtain the code is to use the PerfectApps app built during the preparation step.
|
Creating a Connection and Action in PerfectApps |

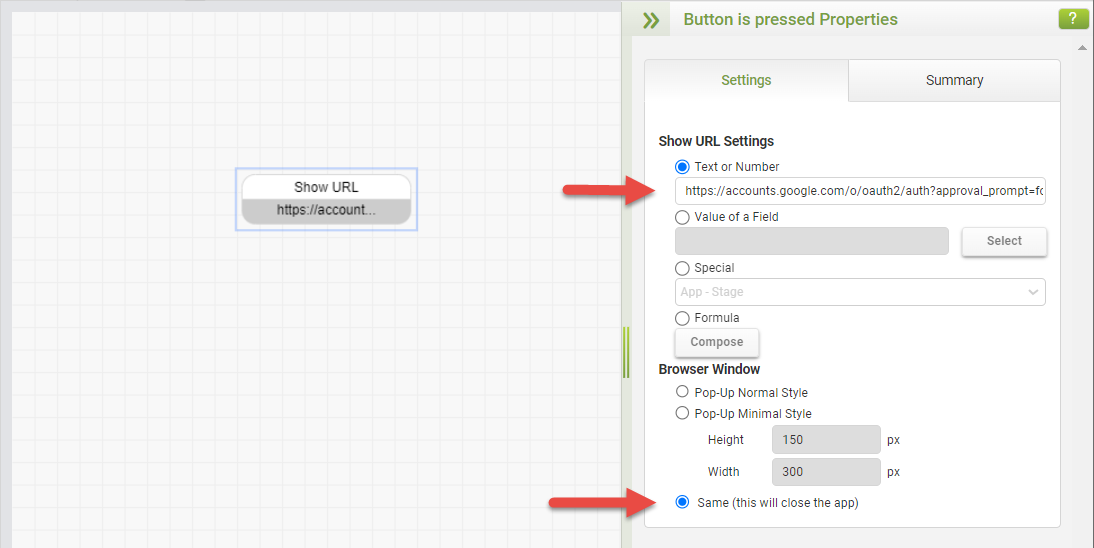
Open the PerfectApps app in design mode and add a Show URL behavior command to the ‘Get Code' Button is pressed event.
Set the value in the Show URL settings in the following format:
https://accounts.google.com/o/oauth2/auth?approval_prompt=force&scope=https://www.googleapis.com/auth/calendar&client_id=<your_client_id>&redirect_uri=<your_redirect_url>&response_type=code
Substitute into the <your_client_id> placeholder your client ID saved in an earlier step.
Substitute into the <your_redirect_url> placeholder the redirect URL (The URL of the PerfectApps app) saved in an earlier step.
In the Browser Window settings, select the option Same (this will close the app)
Save and Publish the app.
Use the link to create an app instance for testing.
Click the Get Code button.
The Show URL command on the button retrieves the code and returns it to a new app instance in the same window. The Set Field command displays that code in the multi-line text input field.
During this process, you may need to choose a Google account. Choose the one used to create the OAuth Client ID.
You might see a warning screen that Google hasn’t verified the app. Continue past the warning.
With the option to get an authorization code from the Google API, the next step is to build a connection that will retrieve a Bearer Token used on subsequent connections.
In PerfectApps, open the Connections dashboard, start a new REST Web Service connection and give it a suitable name.
In the Service URL field, enter: https://oauth2.googleapis.com
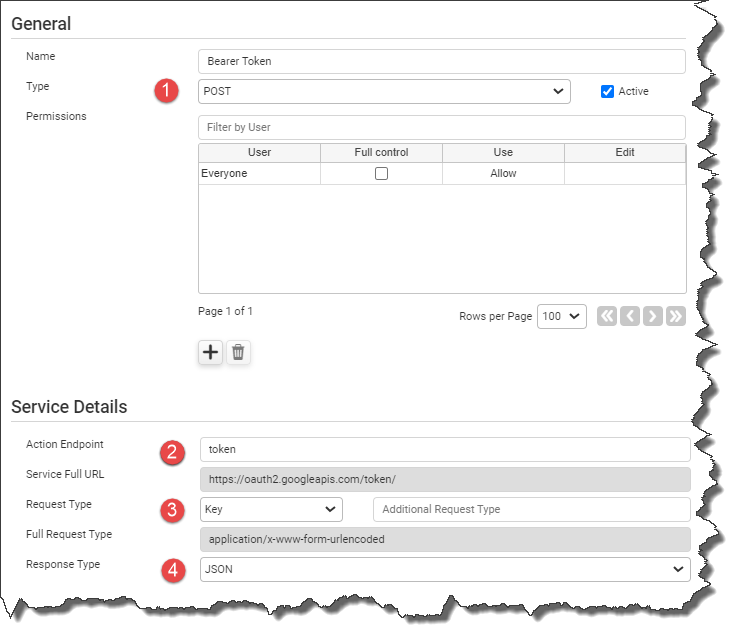
Start a New Action and give it a suitable name.
1. For Type, select POST
2. In the Action Endpoint field enter token
3. For Request Type, select Key
4. For Response Type, select JSON
In the Send Parameters table add the following five parameters:
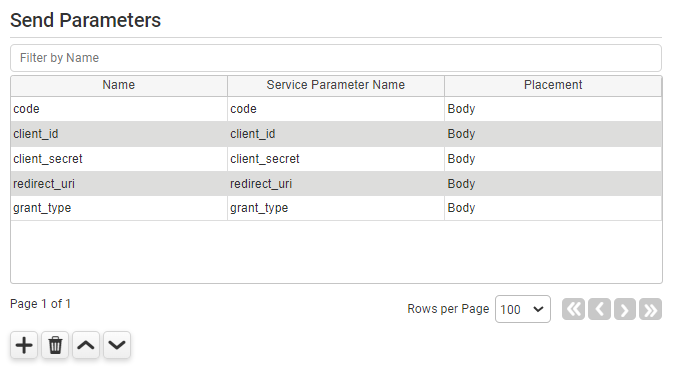
Click the Apply Changes button to save the Send Parameters.
The next step is to run a test connection to check that it works and to retrieve suitable return parameters.
Click the Test button and use the following values for each send parameter:
For code, use the PerfectApps app to generate a code and use it as the value for this parameter.
For client_id, enter the client id saved earlier in the process. Or open the Client ID to get the details.
For client_secret, enter the client secret saved earlier in the process. Or open the Client ID to get the details.
For redirect_uri, enter the URL of the PerfectApps app.
For grant_type, enter the text authorization_code
Initiate the connection using the parameters above and click Close when done.
In the Return Parameters, click the Auto Complete button and click OK to dynamically enter the Return Parameters.
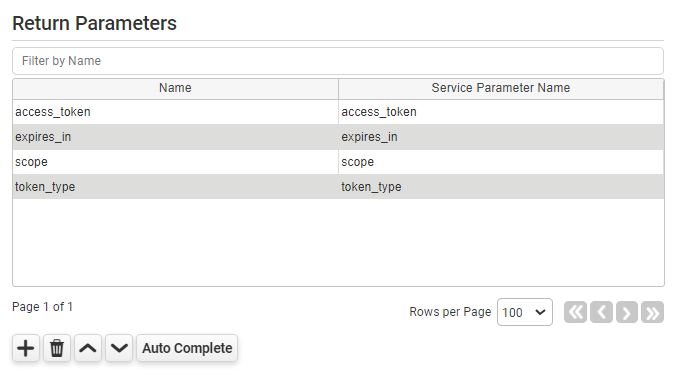
Be aware that the Return Parameters can also be entered manually.
Click the Apply Changes button to save the Action.
The Bearer Token Action is complete and returns the Bearer Token via the ‘access_token’ parameter. The Bearer Token is then used in subsequent API requests.
 |
We recommend that you run a new test using the same values mentioned above to check that a Bearer Token is returned. |
You may now proceed to build any actions that you need for integration with Google.
Further information can be found here: https://developers.google.com/apis-explorer
Return to: Supported REST Web Services, Preparing to integrate with Google, Creating an OAuth Client ID
