
Once you have your OpenAI API key, the next step is to establish a connection between your PerfectApps account and the OpenAI API.
|
To set up a connection between PerfectApps and the OpenAI API: |

1. Log in to your PerfectApps account.
2. Once logged in, navigate to the Connections Dashboard.
3. In the "Connections" section, click the "New" button to set up a new REST Web Services Connection.
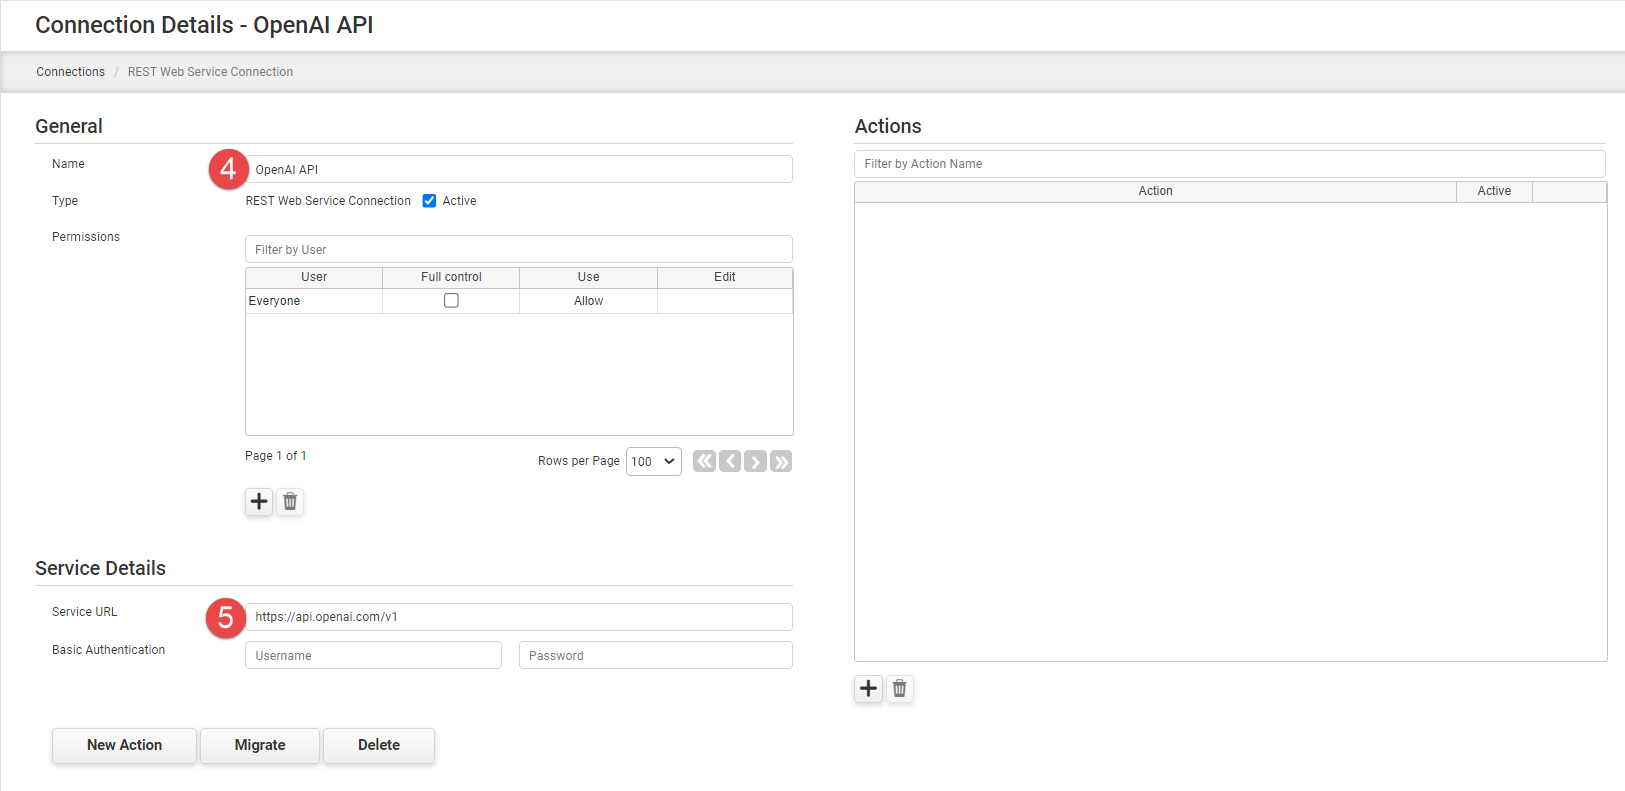
4. In the "Name" field, enter a suggestive name for this connection, such as OpenAI API.
5. In the "Service URL" field, enter the following URL: https://api.openai.com/v1
6. After filling in the necessary information, click Apply Changes to save this new connection.
Now that the connection to the OpenAI API is established the next step is to create a new action to connect to the "Create chat completion" endpoint.
This endpoint is used to create a chatbot conversation.
7. In the newly created "OpenAI API" connection, click the New Action button.
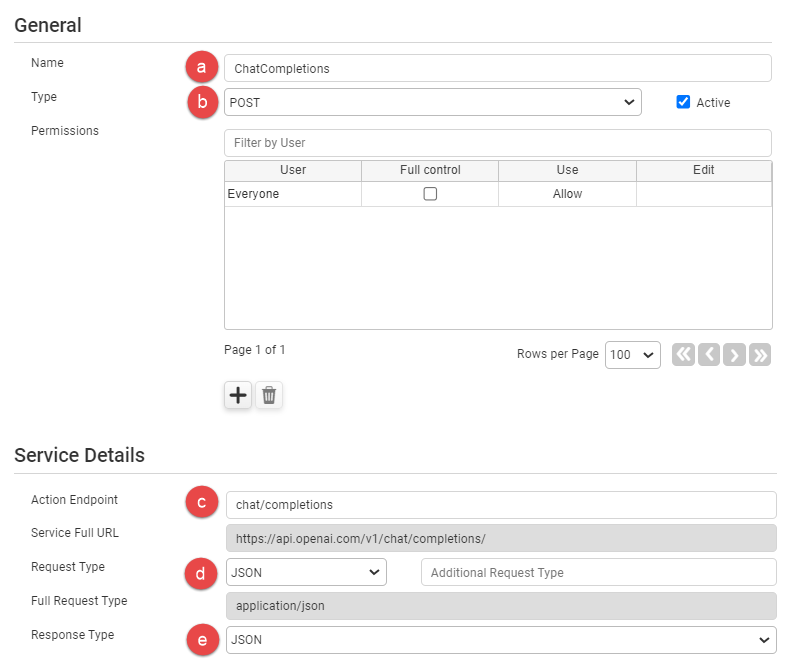
8. You are taken to the Action Configuration screen. Here, specific details about the action will need to be provided:
a)Action Name: Give a suggestive name to the action, such as ChatCompletions.
b)Request Type: Select POST from the drop-down menu.
c)Service Details: In the "Action Endpoint" field, enter chat/completions. This changes the full-service URL to https://api.openai.com/v1/chat/completions/.
d)Request Type: Select JSON.
e)Response Type: Select JSON.
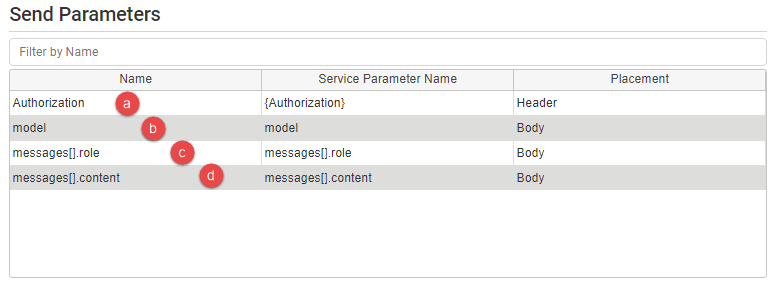
Move to the "Send Parameters" section. Here, the parameters for the API request will be set:
9. Using the "+" button, add four parameters to the "Send Parameter" table. Enter the parameters as follows.
a)Name = Authorization, Service Parameter Name = {Authorization}, Placement = Header.
b)Name = model, Service Parameter Name = model, Placement = Body.
c)Name = messages[].role, Service Parameter Name = messages[].role, Placement = Body.
d)Name = messages[].content, Service Parameter Name = messages[].content, Placement = Body.
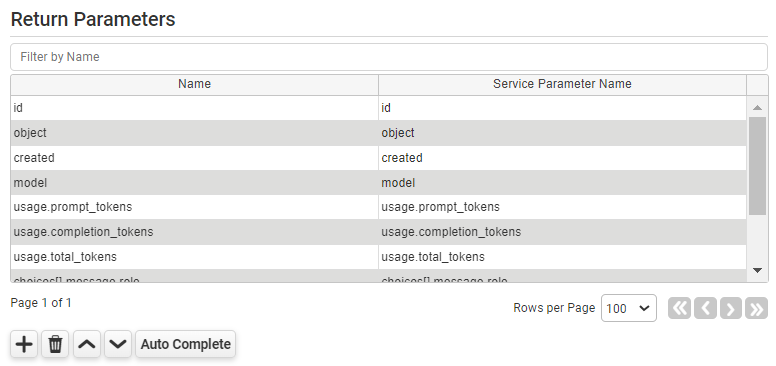
Move to the "Return Parameters" section.
10. Click the Auto Complete button at the bottom of the parameters table. A new window will open asking for a REST Web Service sample response JSON (complete JSON):
11. Copy the sample response below and paste it into the window field.
For more information about how to generate a sample response see https://platform.openai.com/docs/api-reference/making-requests
{
"id": "chatcmpl-123",
"object": "chat.completion",
"created": 1684846524,
"model": "gpt-3.5-turbo-0301",
"usage": {
"prompt_tokens": 24,
"completion_tokens": 10,
"total_tokens": 34
},
"choices": [
{
"message": {
"role": "assistant",
"content": "Hello there! How can I assist you today?"
},
"finish_reason": "stop",
"index": 0
}
]
}
12. Click OK and Apply Changes. The return parameters are populated based on the sample response.
OpenAI Rest Web Service Connection (6 min) |
This tutorial will demonstrate creating a REST Web Service connection and action to the OpenAI API within the PerfectApps connections dashboard.
|

See also: Step 3: Create a chatbot app interface
Return to: How to build an AI powered chatbot, Step 1: Create an OpenAI account
