
The Workflow is important as it determines where the app is routed and who is notified that they need to take action.
Workflows can be simple 2 or 3 stage linear workflows, or complex with many stages and non-linear pathways.
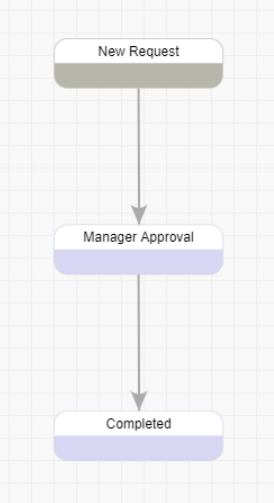
Simple Workflow Example |
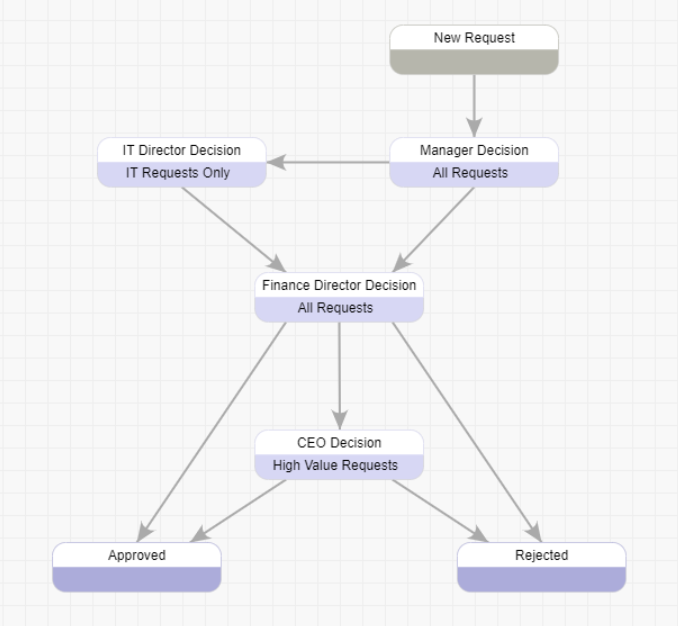
Advanced Workflow Example |
 |
 |
The workflow diagram will include all the logic to drive the process through your organization however it is better to take this step by step.
The initial focus on your workflow diagram should be to define the different stages in the process, but it is important to have a good understanding of the whole process:
Using your requirements, begin to draft out how the workflow should look, here are some helpful tips:
oWhat is the first step, or the starting point, in your process? Drag a stage object onto the app to represent this stage. You will find that the first stage is a gray color representing the Default stage in your workflow. (In the examples above this is shown as the New Request stage)
oWho is going to kick off the process? Who is going to be taking action on the app first?
oWhen the app is initially submitted, who should be receiving a notification to access the app next? Is this coming from a field within the app? What action is this user taking on the app?
oAre there any other actions that need to be taken on the app? If so, who should take action and how should they be notified? (General Email box, field on the app, hard coded email, etc.)
oWhat are the conditions for the workflow to move to the next stages? Is it based on a selection in a field within the app? i.e. if the previous approver has approved the request or if a field is less than $5000 then it routes to a different approver.
Once you have a good understanding of the workflow process you are now ready to create this in the PerfectApps workflow canvas.

1.In the upper left hand corner of the Navigation Panel click on the workflow icon 
2.Looking at your drafted workflow, count how many places the app will make stops at and action will be taken, these will be your stages.
3.Your workflow will likely start with a “New” stage kicked off by the user who will be starting the app. Start by dragging a “stage” object onto the canvas. On the right hand side in the Object Properties panel notice a few things:
a.The first stage dragged on is the default stage, you can determine this as the “Is default stage” checkbox is checked. You can also tell because the stage will have a dark grey fill as opposed to a light blue fill. This can be changed to any stage in the workflow by checking the “Is default stage” checkbox, although it is important to note that the default stage is where the workflow will start. Only one stage can be a default stage.
b.There is another checkbox for “Is closed stage” this will determine the last stage of your app. When the workflow reaches this stage, the app is now in a closed stage. You can have multiple closed stages.
4.Rename your stage to something more identifiable; examples could be “New”, “New Request”, “Employee”, etc.
5.Drag on the next stage corresponding to the next step in the process, and rename it accordingly.
6.Connect the default stage to the newly created stage via a path arrow. Do this by hovering over the edge of the default stage, and click and drag to the next stage to connect them.
7.Repeat these steps for all stages of your workflow including any final stages.
For more information, please see the article for Adding Workflow
|
Workflow Stages (4 min) |
Workflow logic determine how app instances will move through your organization. The first task in setting up your workflow logic is to define the different stages in your process. |
|
Comments (4 min) |
Comments are an important part of any system. Watch this video to learn about the different ways to add comments onto your workflow diagram. |

Next: Creating your User Roles
Return to: App Design - Getting Started, QuickStart Tutorials
