
|
New App Registration. |

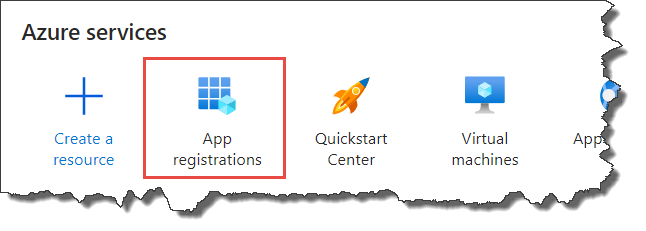
Open your Microsoft Azure account.
Click the option for App Registrations. (There is a search option available to help)
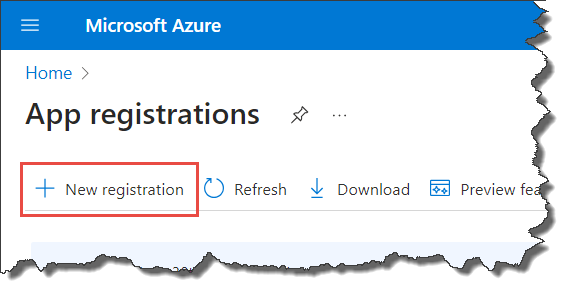
Select the option to create a New Registration.
Enter a user-facing display name and the option Accounts in this organizational directory only.
Add a redirect URL using the Web type. Use the App URL saved during the preparation phase.
Click the Register button to register the new app.
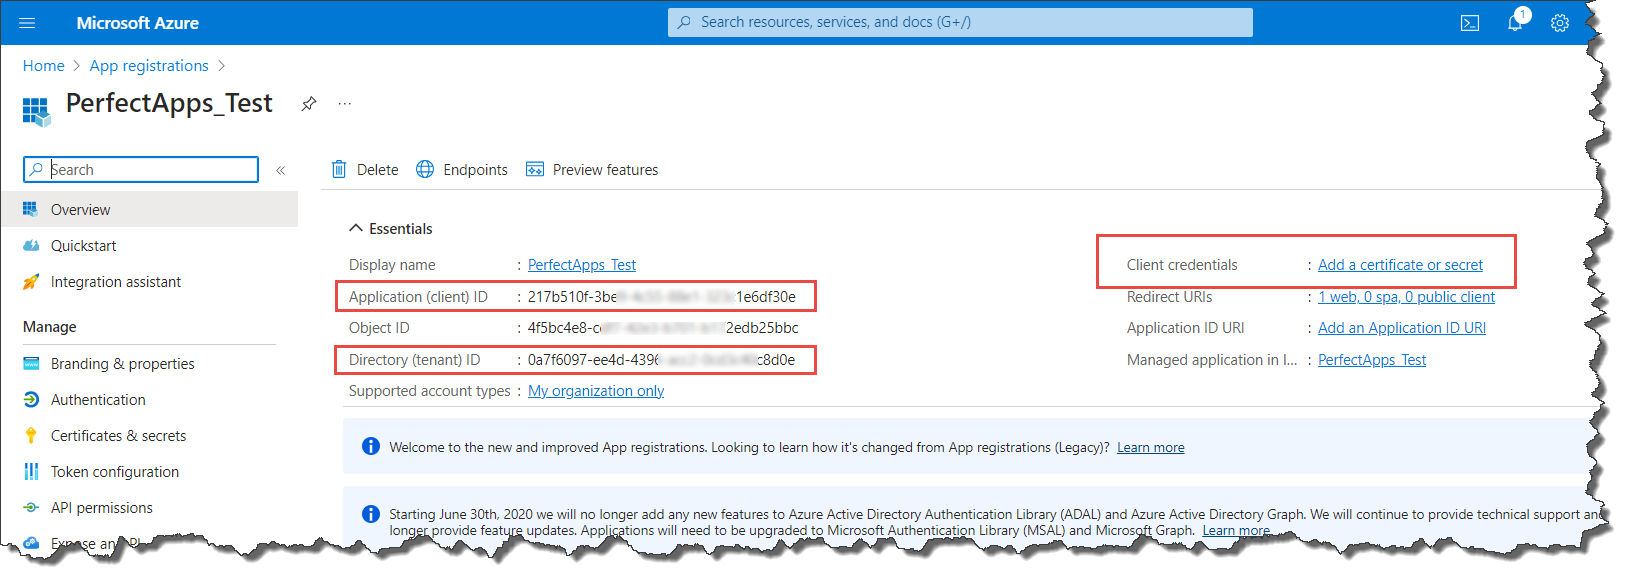
From the Overview screen save the Application (client) ID and the Directory (tenant) ID and store them somewhere safe for use later.
From the Overview screen choose the option to Add a certificate or secret.
Click the New client secret button.
Enter a suitable description and an expiry duration. Note that client secrets will expire after a defined period and a new secret will need to be set and used in subsequent calls.
Click the Add button to create the client secret.
From the Certificates & secrets page copy the Client Secret - Value and save it somewhere safe to use later.
 |
Note that Client secret values cannot be viewed, except for immediately after creation. Be sure to save the secret when created before leaving the page. |
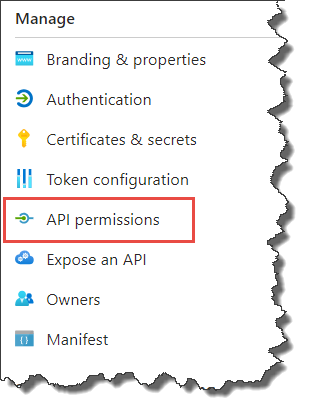
Once the application registration is complete and a client secret has been set, the next step is to set permissions using the API permissions option.
Click on the API permissions option.
 |
In this example we will use the Microsoft Graph option. The Microsoft Graph contains many scopes but other API permissions are also available. |
Click on the API / Permission name Microsoft Graph.
With Delegated permissions chosen as the type of permission, select all four of the options from the OpenId permissions section.
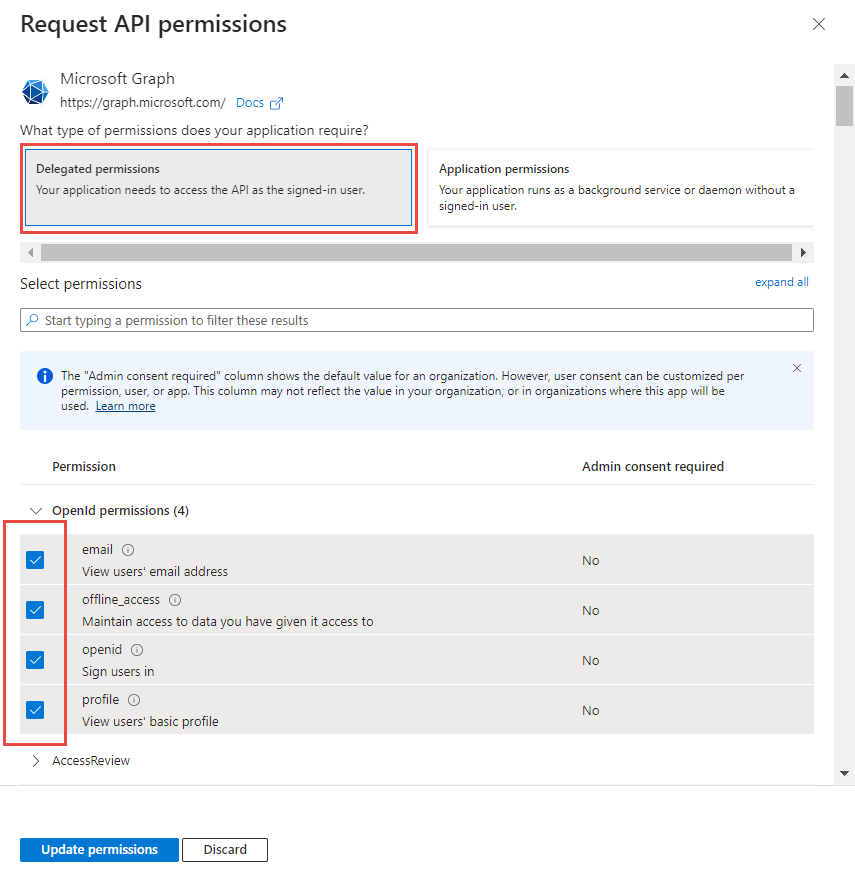
Click the Update Permissions button.
With credentials set, you are ready to create the authentication for the Bearer Token that’s used in other actions.
Next Step: Creating a Microsoft connection
Return to: Supported REST Web Services, Preparing to integrate with Microsoft
