


OpenAI’s ChatGPT allows people to get quick answers to complex questions through conversational interactions powered by artificial intelligence (AI). In our last blog in this series, we explored how integrating ChatGPT with PerfectApps can enable your business to deliver new services to customers. In this blog, we provide a detailed, easy-to-follow tutorial on combining ChatGPT and PerfectApps to create an AI-powered chatbot.
Step 1: Create an OpenAI account and generate an OpenAI application programming interface (API) key.
1. Go to the OpenAI website.
2. Click Sign Up.
3. Enter the requested information to create your account.
4. Log in with your new credentials.
5. Follow the instructions to upgrade to a paid account.
6. Go to the API Keys section of your account.
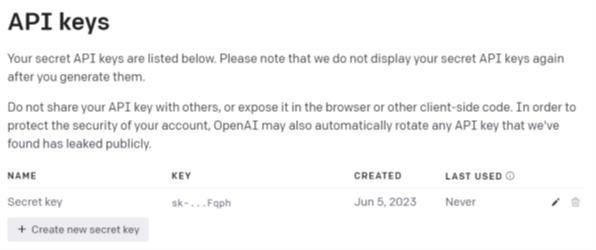
7. Click +Create New Secret Key to generate an API key. You can enter a description of the key in the pop-up window to help you identify it later.
8. Your new API key will appear in the Active Keys list. You’ll need the key to make requests to the OpenAI API. Copy the key and keep it in a secure place. Treat it like a highly sensitive password and keep it confidential.
Step 2: Set up a connection to the OpenAI API.
1. Log into your PerfectApps account.
2. Go to the Connections Dashboard.
3. In the Connections section, click New to set up a new REST Web Services Connection.
4. In the Name field, enter a descriptive name such as OpenAI API.
5. In the Service URL field, enter this URL: https://api.openai.com/v1
6. Enter the requested information and click Apply Changes.
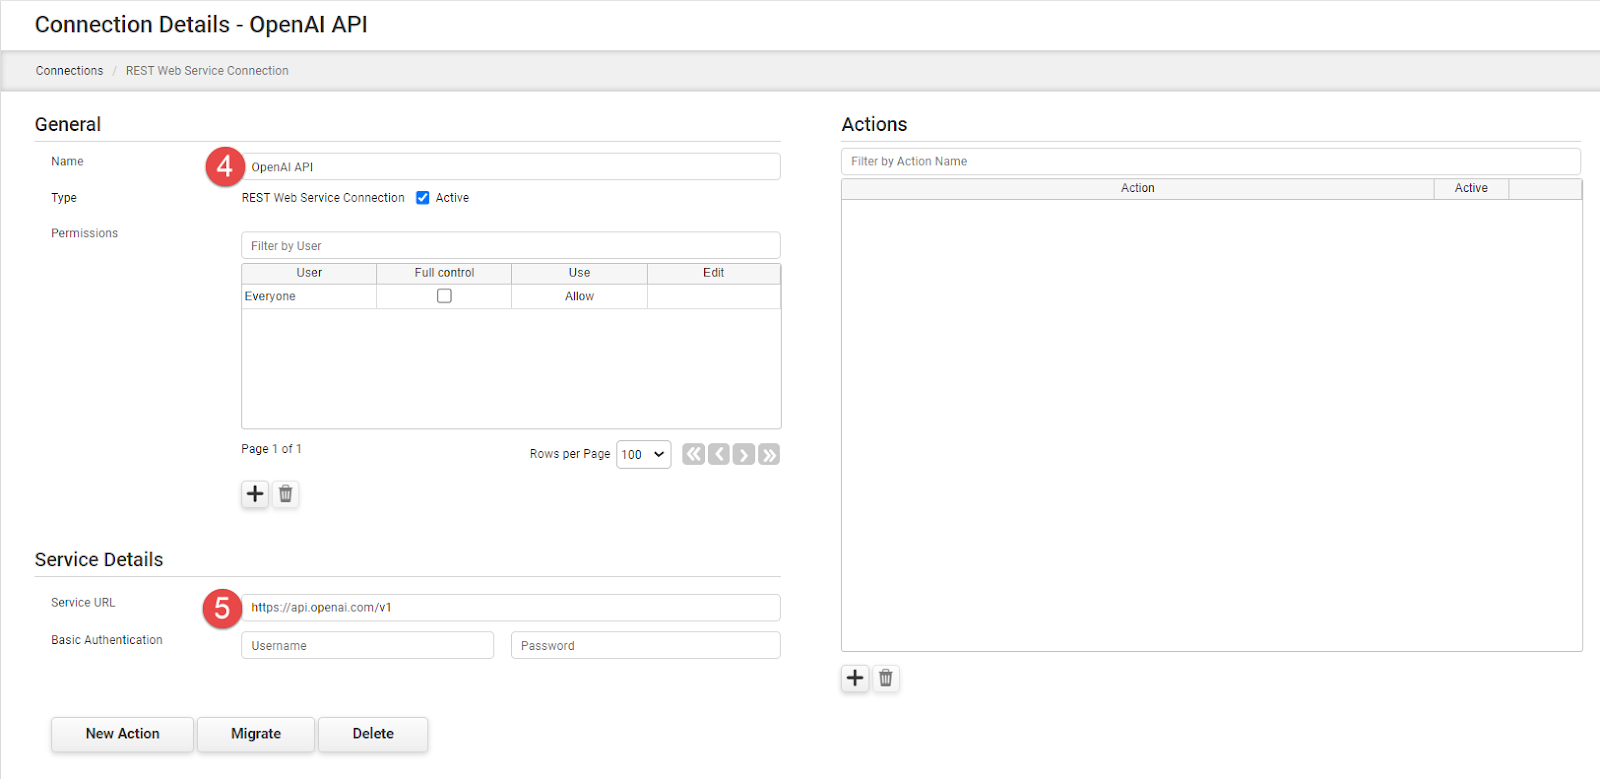
Now that the connection to the OpenAI API is established the next step is to create a new action to connect to the “Create chat completion” endpoint.
This endpoint is used to create a chatbot conversation.
7. In the new OpenAI API connection, click New Action.
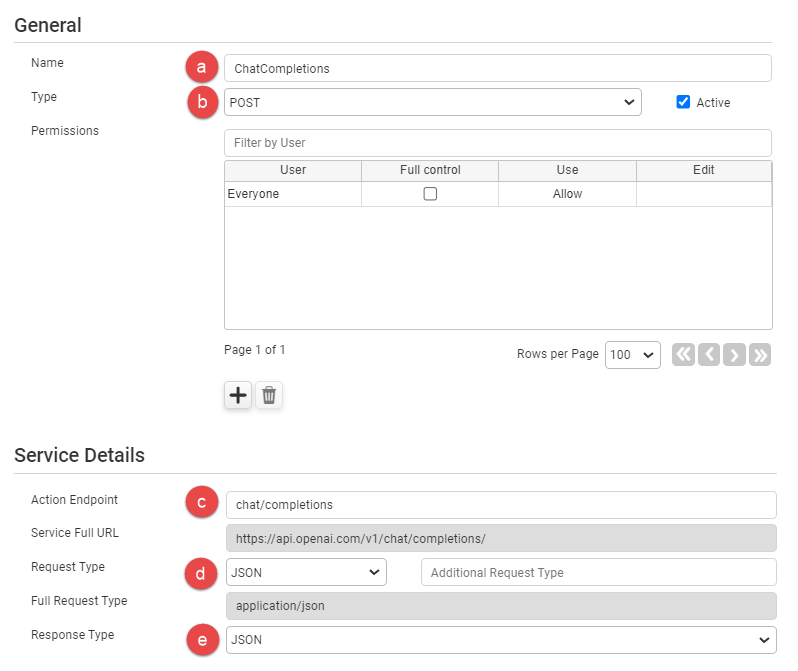
8. In the Action Configuration screen, enter this information:
- Action Name: Enter a descriptive name such as Chat Completions.
- Service Details: In the Action Endpoint field, type chat/completions. That will change the full-service URL to https://api.openai.com/v1/chat/completions/.
- Request Type: Select POST from the dropdown menu.
- Request Type: Select JSON.
- Response Type: Select JSON.
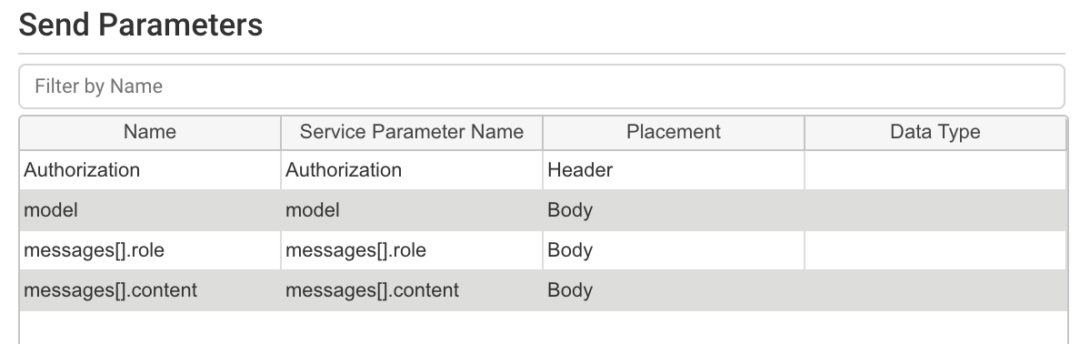
9. Go to the Send Parameters section of the screen.
10. Using the + button, add four parameters to the Send Parameter table. Enter the parameters as follows.
- Name = Authorization, Service Parameter Name = Authorization, Placement = Header.
- Name = model, Service Parameter Name = model, Placement = Body.
- Name = messages[].role, Service Parameter Name = messages[].role, Placement = Body.
- Name = messages[].content, Service Parameter Name = messages[].content, Placement = Body.
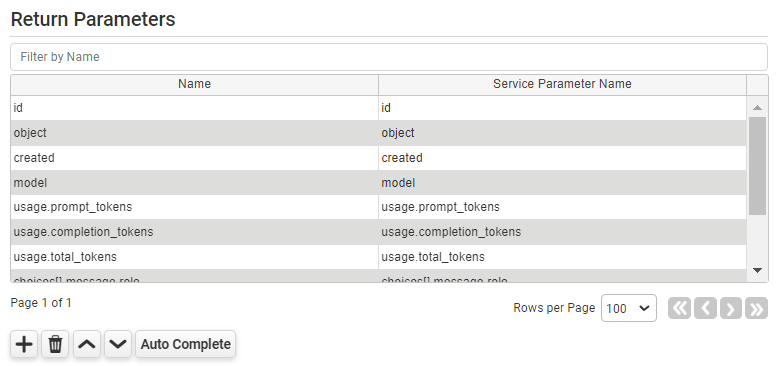
11. Go to the Return Parameters section of the screen.
12. Click Auto Complete at the bottom of the parameters table. A new window will open asking for a REST Web Service sample response JSON (complete JSON):.
13. Copy this sample response and paste it in the Window field:
For more information about how to generate a sample response see https://platform.openai.com/docs/api-reference/making-requests
{
"id": "chatcmpl-B9MBs8CjcvOU2jLn4n570S5qMJKcT",
"object": "chat.completion",
"created": 1741569952,
"model": "gpt-4.1-2025-04-14",
"choices": [
{
"index": 0,
"message": {
"role": "assistant",
"content": "Hello! How can I assist you today?",
"refusal": null,
"annotations": []
},
"logprobs": null,
"finish_reason": "stop"
}
],
"usage": {
"prompt_tokens": 19,
"completion_tokens": 10,
"total_tokens": 29,
"prompt_tokens_details": {
"cached_tokens": 0,
"audio_tokens": 0
},
"completion_tokens_details": {
"reasoning_tokens": 0,
"audio_tokens": 0,
"accepted_prediction_tokens": 0,
"rejected_prediction_tokens": 0
}
},
"service_tier": "default"
}
14. Click OK and Apply Changes. The return parameters will be populated based on the sample response.
| This video tutorial will demonstrate creating a REST Web Service connection and action to the OpenAI API within the PerfectApps connections dashboard. |
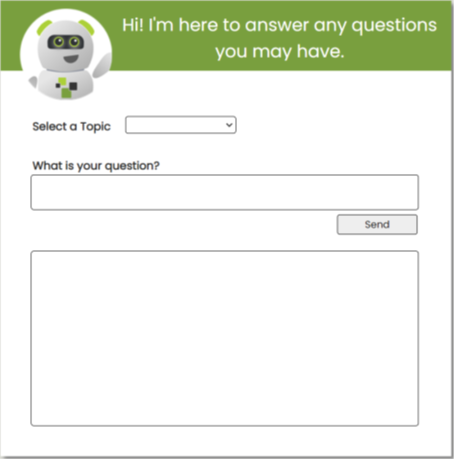
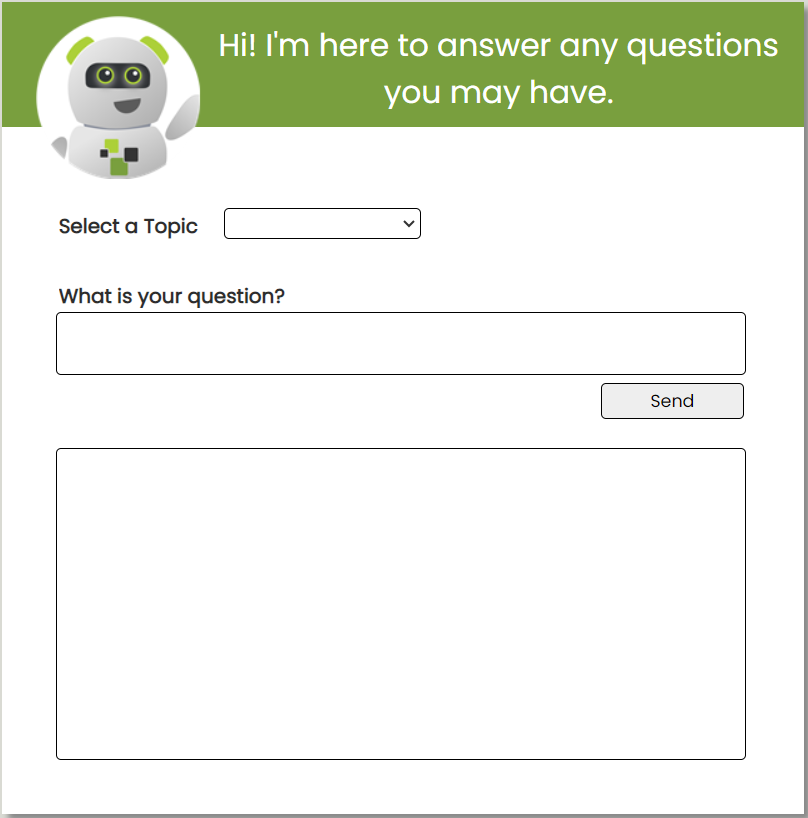
Step 3: Create a chatbot interface.
The chatbot interface requires the following objects:
1. A Dropdown object to select a topic category, including relevant items. For instance, if your chatbot will advise on finance and technology, you might add Finance and Technology as options in the dropdown. Suggested name: Topic
2. A Multiline Text Input object to enter questions for the chatbot. The object should be large enough to display questions entered – for example, 50 pixels high with a character limit of 1,000. The object state should be Normal. Suggested name: UserMessage
3. A Multiline Text Input object to display the chat history. The object should be large enough to display much of the conversation – for example, 300 pixels high with a character limited of 99,999. The object state should be Read Only. Suggested name: ChatHistory
4. A Button object to trigger the logic that initiates the conversation. Suggested name: Send
5. Text and Heading objects to convey instructions or act as labels for the input fields.
6. Add graphics to make the application visually attractive.
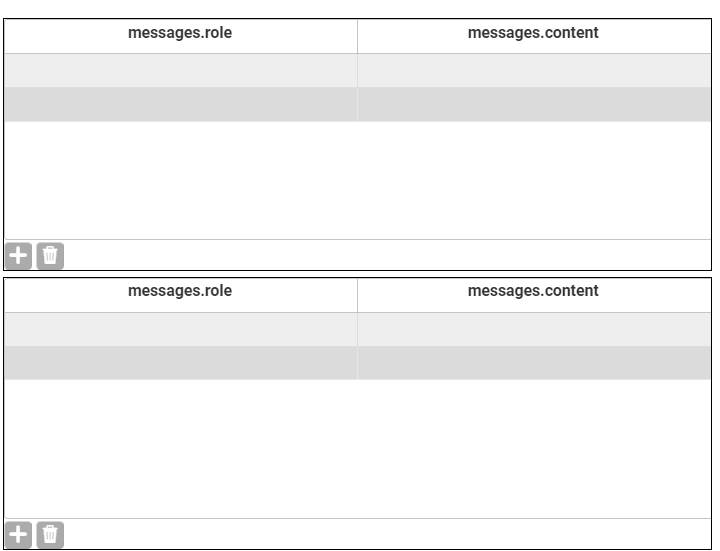
7. A hidden helper page that includes two Table objects. The Table objects should each have columns named messages.role and messages.content. The tables will serve as data storage for the interaction between the chatbot and the user. Suggested names: SendMessages and ResponseMessages
8. Finally, the page should be larger than the default 500 x 400 pixels, such as 640 x 650 pixels.
Step 4: Connect the chatbot interface and the connection.
The behavior in the chatbot interface determines how users interact with the chatbot. The logic is contained in the Button Is Pressed behavior event in the Send button, as shown below:
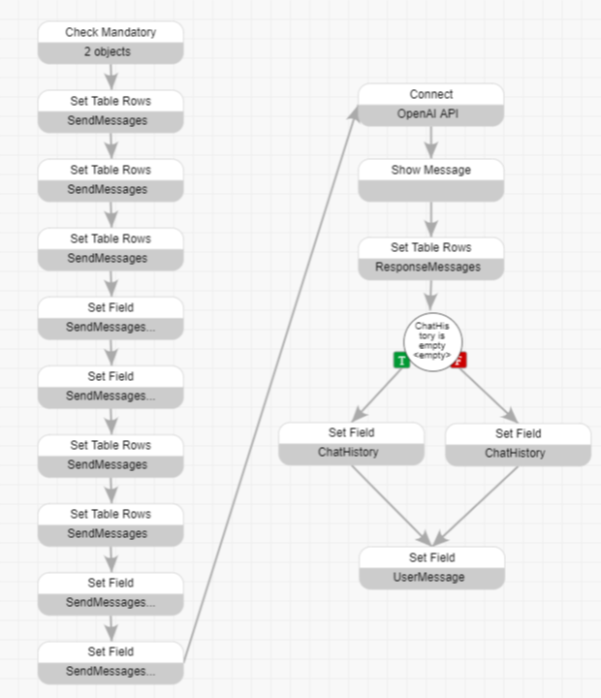
1. Select the Send button and open the Button Is Pressed behavior event.
2. Include a Check Mandatory behavior command and include the fields Topic and UserMessage.
3. Add three Set Table Rows behavior commands to add a row at the end of the table and select that row.
- In the first command, select the SendMessages table and the action Delete All Rows. That will clear the table of data from previous questions.
- In the second command, select the SendMessages table and the action Add Row at End.
- In the third command, select the SendMessages table and the action Move Current Row to Last Row.”
4. Add two Set Field behavior commands to add data necessary for the Connection Send parameters:
- In the first command, select the table/column SendMessages – message.role – CurrentRow and the text value “system”.
- In the second command, select the table/column SendMessages – message.content -Current Row and the value of a field as Topic – Caption.
5. Add two Set Table Rows behavior commands to add another row at the end of the table and to select that row:
- In the first command, select the SendMessages table and the action Add Row at End.
- In the second command, select the SendMessages table and the action Move Current Row to Last Row.
6. Add two Set Field behavior commands to add data necessary for the Connection Send parameters:
- In the first command, select the table/column SendMessages – message.role – CurrentRow and the text value “user”.
- In the second command, select the table/column SendMessages – message.content -Current Row and the value of a field as UserMessage.
7. Add a Connect behavior command to initiate the connection to the OpenAI API:
- Select the OpenAI API connection and action you created above under “Step 2: Set up a connection to the OpenAI API.”
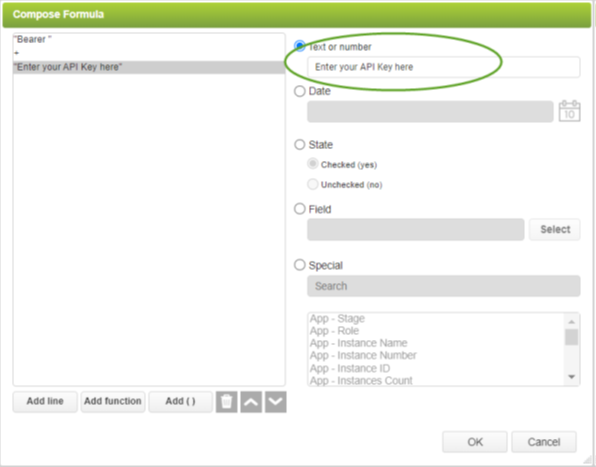
- For the source of the Authorization send parameter, use the formula option and set the parameter to Bearer <your API Key>. Make sure there’s a space after Bearer, and enter your API key in the Text or Number field highlighted below.
- For the source of the Model send parameter, use the formula option and set the parameter to gpt-3.5-turbo.

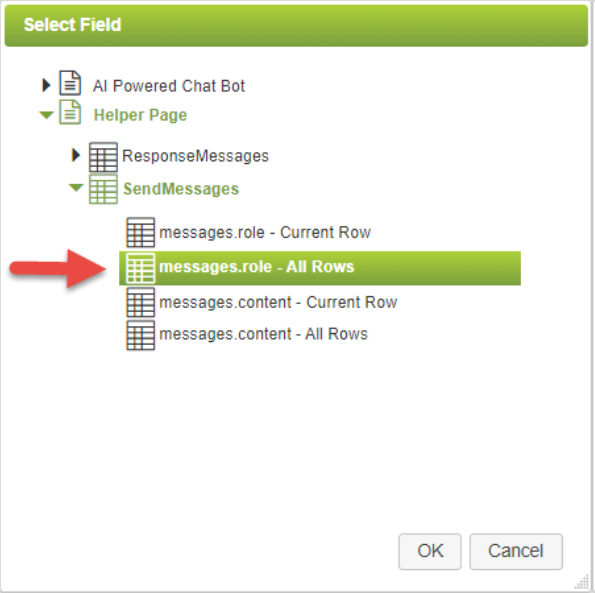
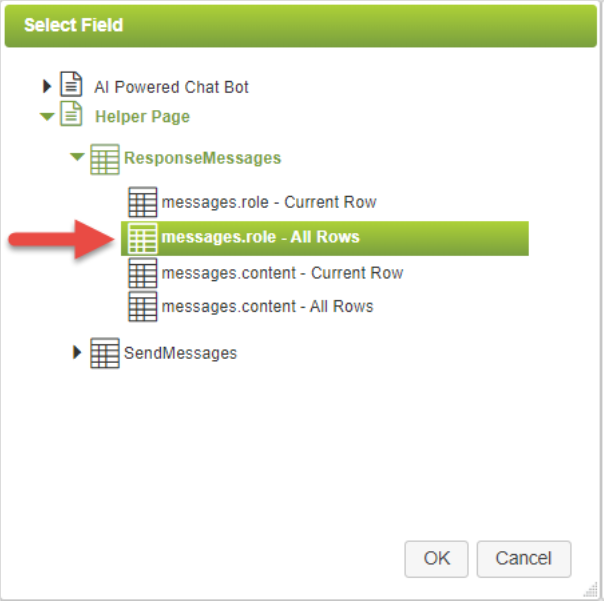
- For the source of the messages[].role send parameter, go to the SendMessages table and select messages.role – All Rows.
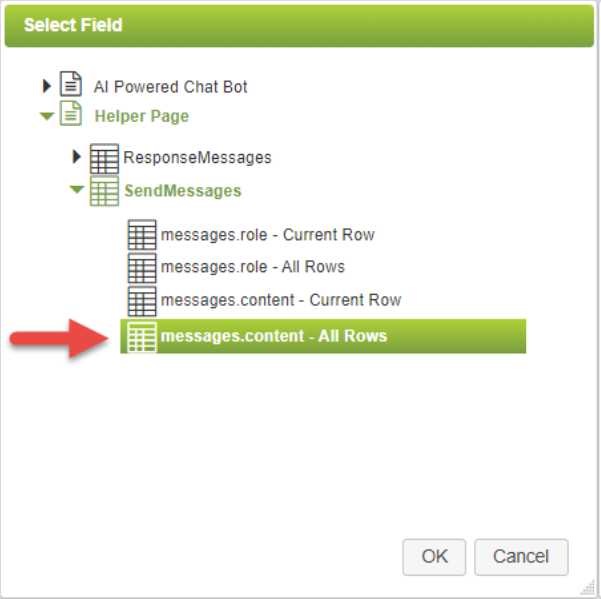
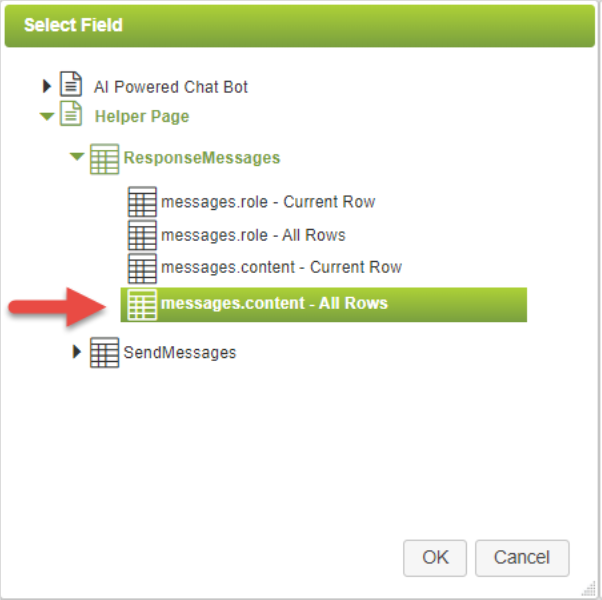
- For the source of the messages[].content send parameter, go to the SendMessages table and select messages.content – All Rows.
- In the Return Parameters section, go to the choices[].message.role parameter. For the target, go to the ResponseMessages table and select messages.role – AllRows.
- For the target of the choices[].messages.content return parameter, go to the ResponseMessages table and select messages.content – All Rows.
8. Add a Show Message behavior command with no text. This is used to pause the execution of the behavior momentarily, allowing time for the response from the Connect command to be received.
9. Add a Set Table Rows behavior command. Select the ResponseMessages table and the action Move Current Row to Last Row.
10. Add a Simple Branch behavior command. A slightly different behavior is required for the first response when the ChatHistory field is empty. Set the condition to ChatHistory Is Empty.
11. Add two Set Field behavior commands, one linked by the True path from the simple branch command and one linked by the False path.
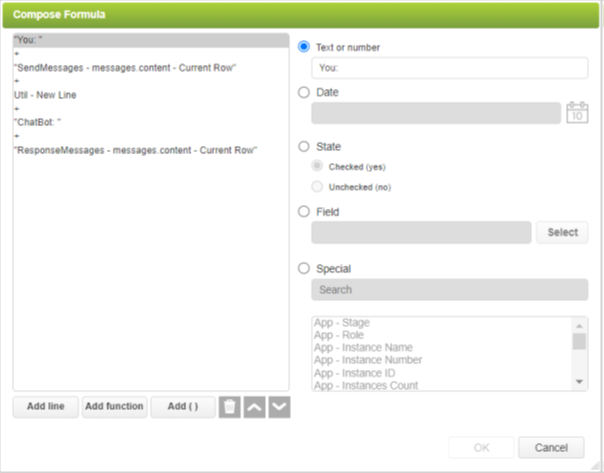
- For the command linked by the True path, set the ChatHistory field value by using the Formula Editor as shown below.
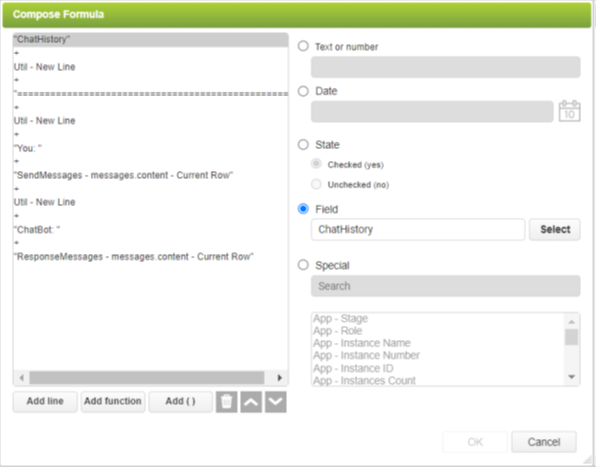
- For the command linked by the False path, set the ChatHistory field value by using the Formula Editor as shown below. Note that the separator used in Line 3 might need to be adjusted to suit the size of the application.
12. Add a Set Field behavior command. The command should be linked to from both Set Field commands described above. Set the UserMessage field to be empty (Text or Number = ’empty’). That will remove the previous question, allowing the user to ask a new question.
Your chatbot should be ready to deploy! Use the Preview an App option to test it. Then save, exit, and publish your chatbot. You can now start benefiting from combining ChatGPT with PerfectApps to improve customer service and build stronger customer relationships.